Summary
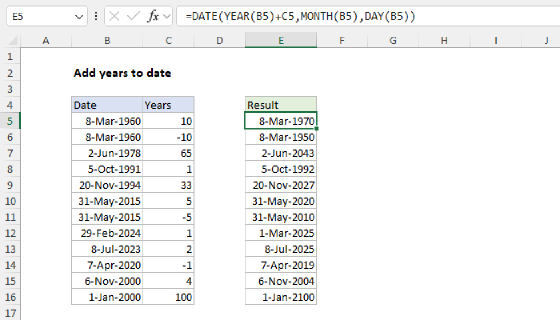
To add a given number of years to a date, you can use the EDATE function. In the workbook shown, the formula in F5 is:
=EDATE(date,D5)
As the formula is copied down, it adds the months in column B to the date in cell B5. The result in each row is a new date as shown.
Generic formula
=EDATE(date,months)
Explanation
In this example, the goal is to add a given number of months to a date. If the number of months is positive, the date should move forward. If the number of months is negative, the date should move backward. The standard solution for this problem in Excel is to use the EDATE function although in certain cases you may want to use the EOMONTH function instead. Both approaches are explained below.
The EDATE function
The EDATE function can add or subtract whole months from a date. You can use EDATE to calculate expiration dates, contract dates, due dates, anniversary dates, and other dates in the future or past. The generic syntax for EDATE looks like this:
=EDATE(start_date,months)
EDATE takes two arguments as follows:
- start_date - The starting date, which must be a valid Excel date.
- months - The number of months before or after start_date. A positive number will move the date forward and a negative number will move the date backward.
The EDATE function is fully automatic. Simply supply a valid date and a number for months and EDATE will return a new date. For example, if we give EDATE the date June 1, 2024, and the number 3 for months, the result is September 1, 2024:
=EDATE("1-Jun-2024",3) // returns "1-Sep-2024"
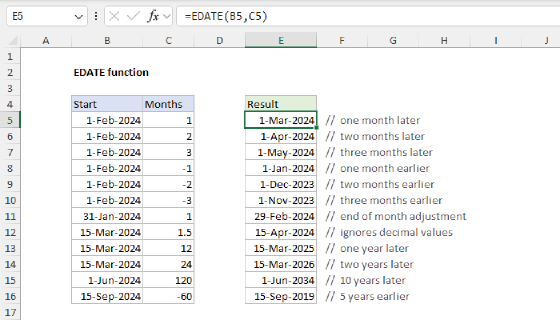
In the worksheet shown, we have a start date in cell B5 and a various number of months in column D. The formula in cell F5 looks like this:
=EDATE($B$5,D5)
Note that $B$5 is an absolute reference to lock this cell as the formula is copied down:
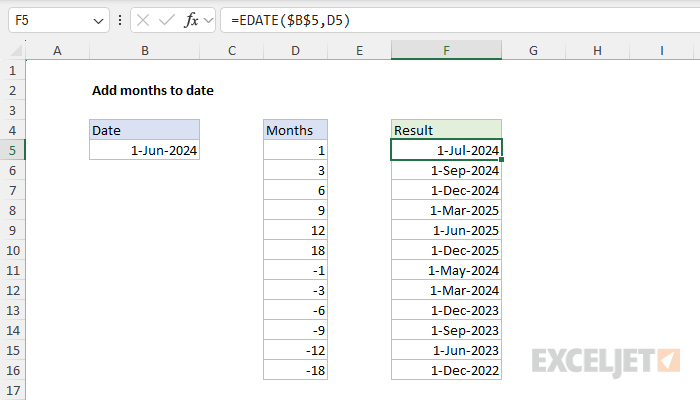
As the formula is copied down, it adds the months in column B to the start date in cell B5. The result in each row is a new date as shown. Notice that the positive month numbers in D5:D10 move the date forward in time and the negative month numbers in D11:D16 move the date back in time. If we change the start date in B5 to September 12, 2024, we get a new set of dates:
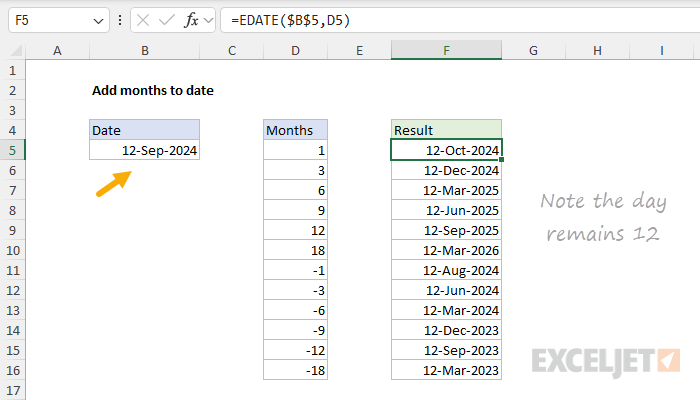
Note the output from EDATE keeps the day (12) from the start date.
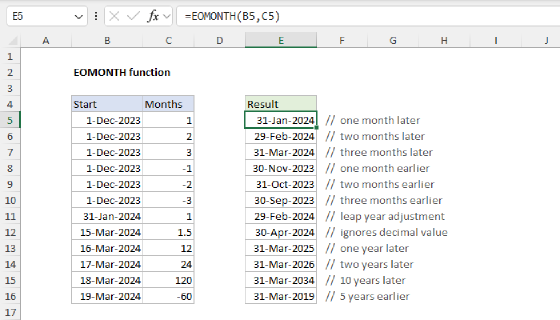
The EOMONTH function
In specific situations, you may want to add months to a date and end up on the last day of the month, regardless of the starting day. In that case, you can switch from the EDATE function to the EOMONTH function. EOMONTH works just like EDATE, so it is a drop-in replacement. In the worksheet below, the formula in cell B5 is:
=EOMONTH($B$5,D5)
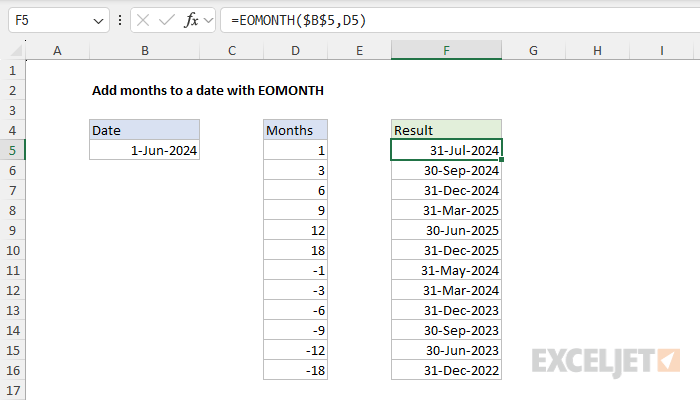
The result from EOMONTH is the same as EDATE except that all dates are at the end of the month. The day in the start date is not used.
Adding years
To add years to a date, you can multiply by 12 inside EDATE like this:
=EDATE(A1,12*10) // 10 years
=EDATE(A1,12*50) // 50 years
Excel will solve the multiplication first, then feed the result to EDATE as the months argument. For a more detailed discussion of this topic, see this page.